Ok, we’re getting there…
With all of the delays lately, it’s been a bit challenging to be productive at writing. It’s particularly hard to write about things you’re doing when you aren’t able to finish any projects. And this is where I am. I have ordered fabric, and I have ordered trim. And I have ordered thread. And some of those things are here and some are not, and I’ve been kind of piecemeal working on different projects as supplies come in, but never finishing any of them. Fortunately, I think I’m reaching the end of this and will very soon have a lot of projects finished at the same time. <<crosses fingers>>
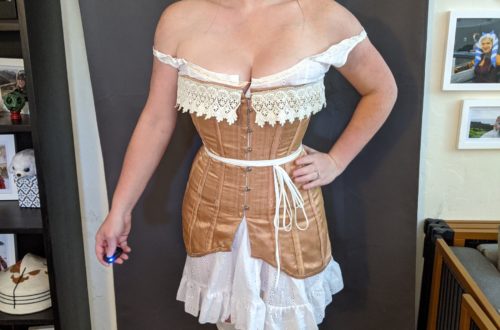
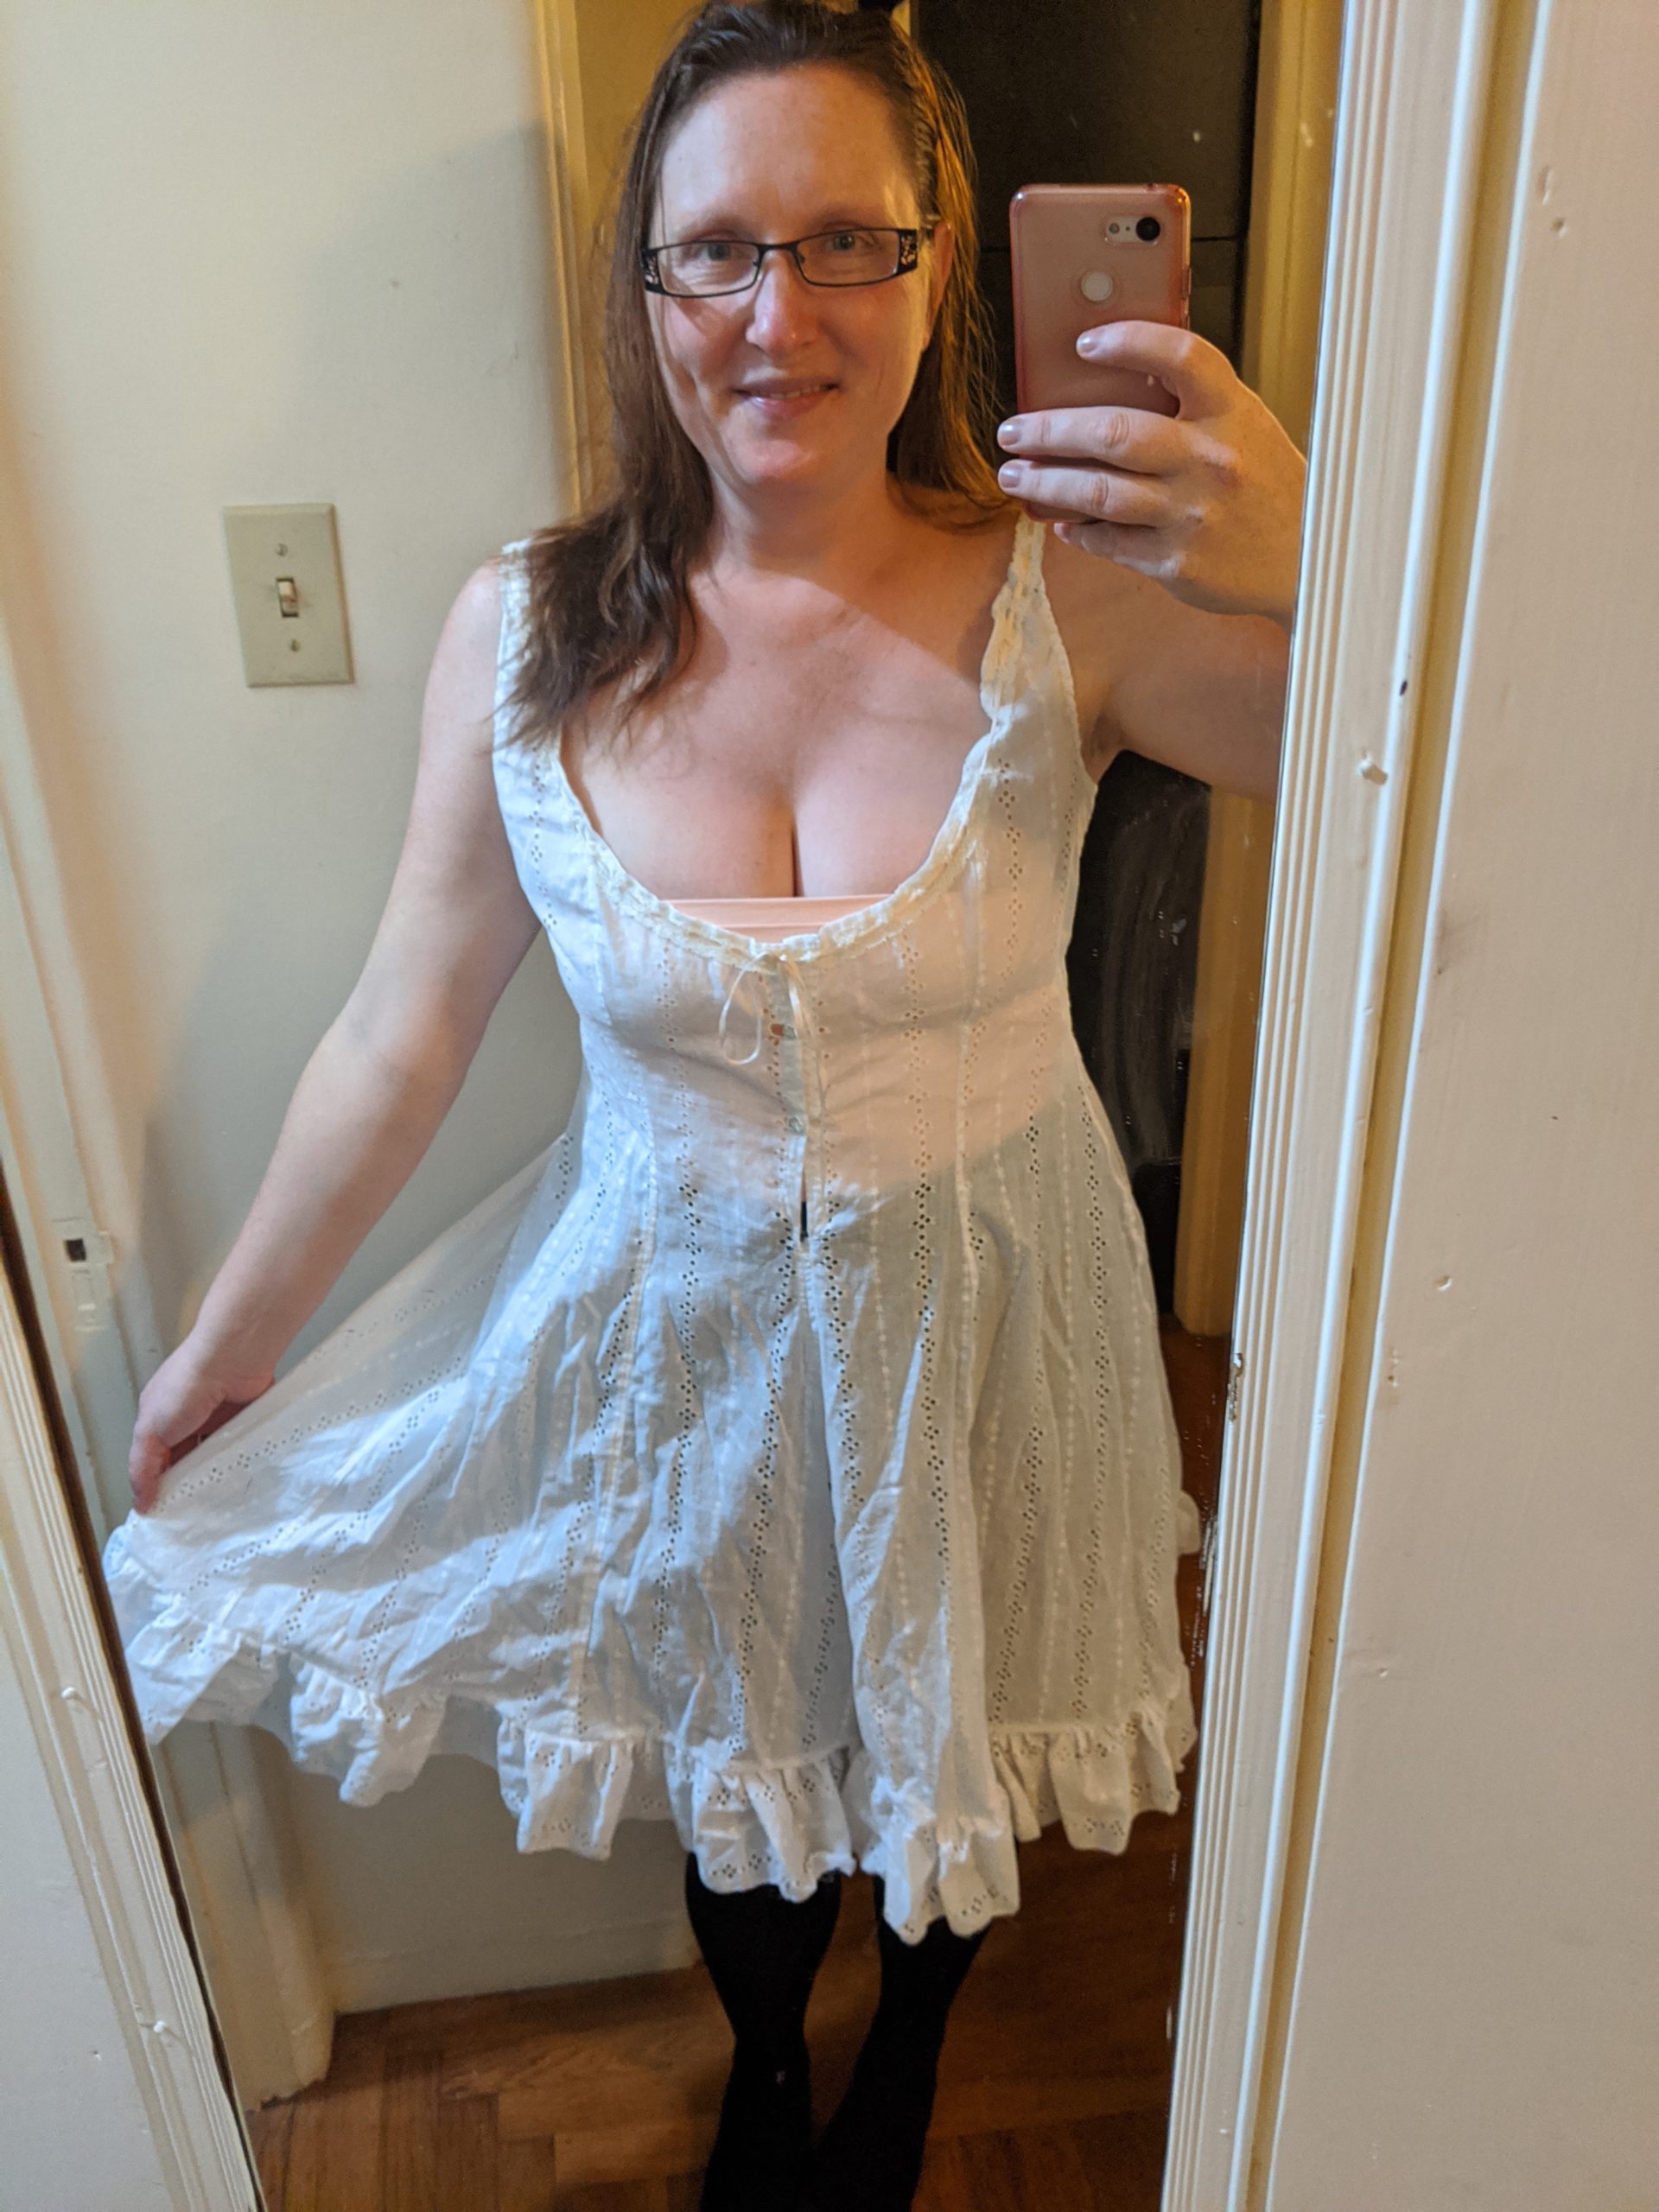
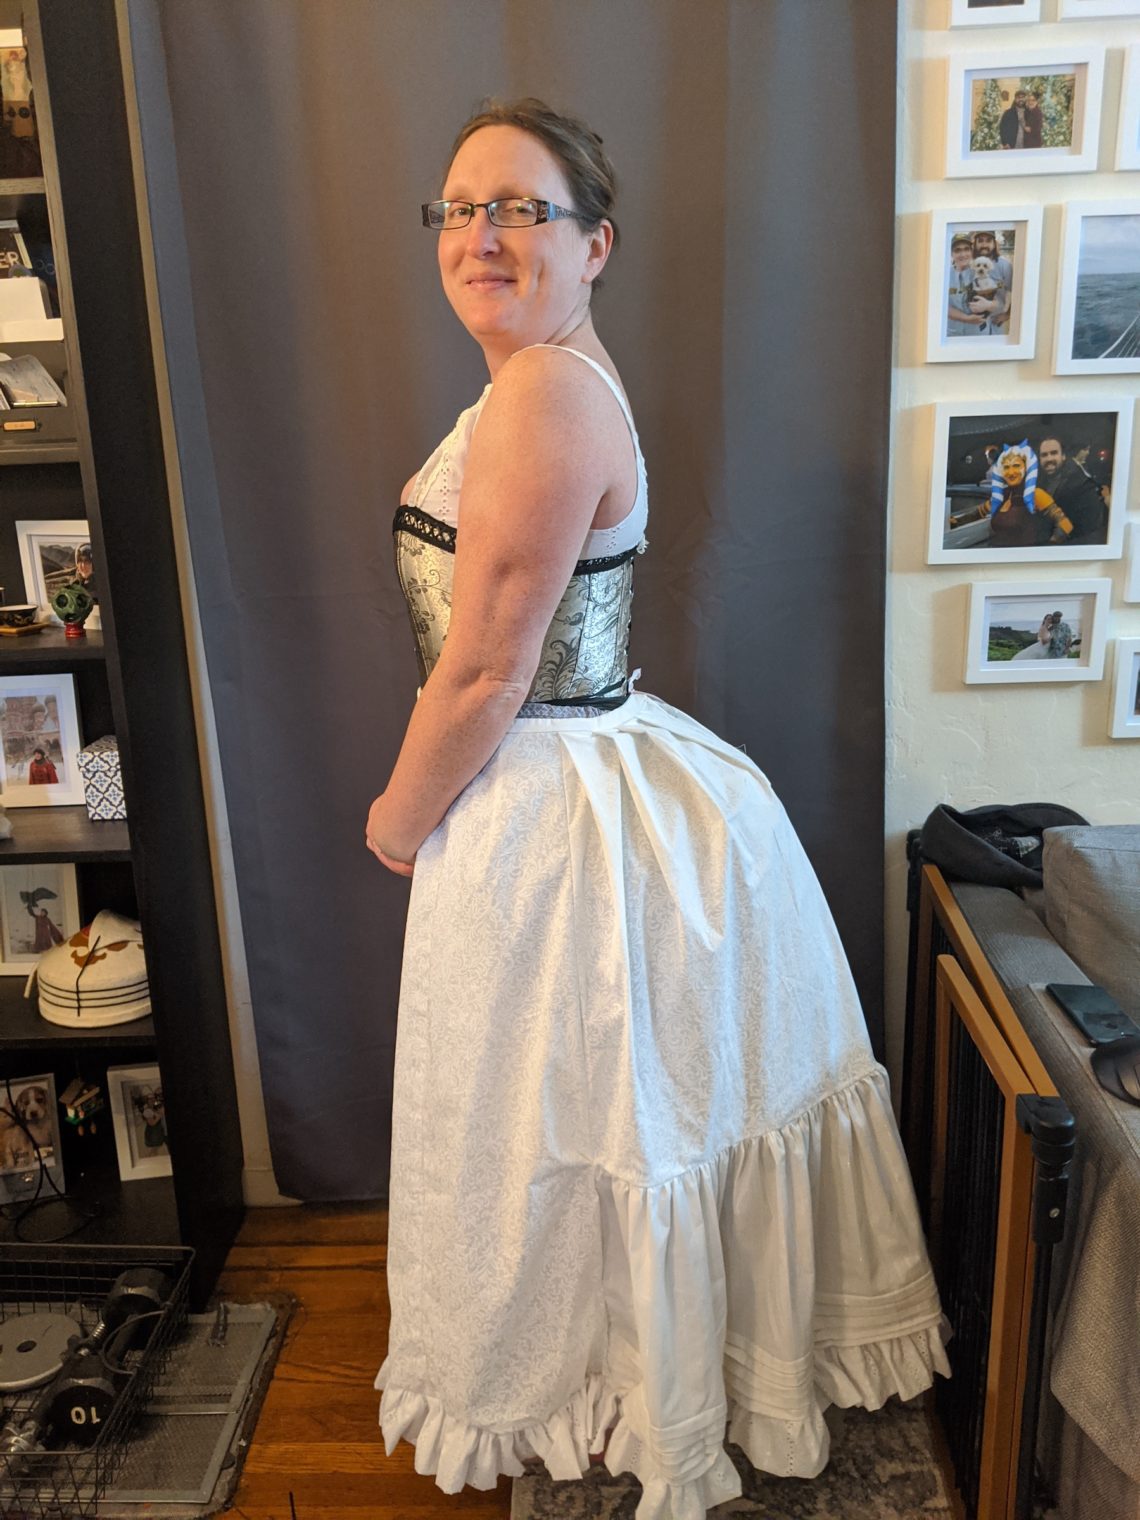
For today’s project, which will be brief, I completed the next layer of my 1880’s late bustle era dress: the petticoat. I have previously completed the lobster tail bustle, and now I have finished the next layer over that. The petticoat is there just to give a bit of fullness to the skirt and to mask the appearance of the boning in the bustle. It smooths out the lines, but it isn’t a stiff net petticoat and doesn’t particularly add a lot of volume.
I chose the pattern from the Truly Victorian line, TV170, Victorian Petticoats. It has options for the different eras, and I chose the appropriate version for the largest bustle era. I cut out all of the pieces and started assembly.
Petticoats are not the most complicated items, in terms of construction, so this went together quite smoothly. The front part of the skirt is supposed to lay flat, so it gets a few darts around the waist line. The back has to fit over a bustle, so it gets gathered to the waist band.
The only challenging/interesting part of this petticoat pattern is the pin-tucks. There are 5 parallel 1-inch pin-tucks around the bottom hem. I thought it would give a bit of interest to the skirt to use a “contrasting” fabric for the pin-tuck panels. Most of the skirt is made from a white-on-white swirl print cotton quilting fabric. The pin-tuck part is made of a white pin-stripe fabric. White-on-white-on-white: “contrast”. Anyway, this brilliant decision to use a striped fabric for the pin-tucks was a blessing and a curse. On the one hand, it was really obvious if any of the pin-tucks were slightly mis-aligned, as the stripes of the fabric would no longer line up. This helps with construction and quality control. On the other hand, it is really obvious when things aren’t lined up perfectly. And it is impossible to be perfect, and I spent quite a lot of time pinning, and measuring, and re-pinning and re-measuring and pressing and finally came the stitching. In the end, I am quite happy with how the pin-tucks turned out.
The last step in construction was to add a flounce around the bottom. This is in another “contrasting” white fabric, this time an eyelet cotton. The flounce is just a huge, gathered strip around the back 3/4 of the skirt to give it a little more fullness and support at the hem. I’m fairly short, so the flounce, as sized in the pattern would have made it so long that it dragged the ground. So I decided to fold it in half to make it half as long. In the end, this wasn’t necessarily the best approach. While it saved me from having to hem the entire bottom edge of it, it also made it a bit bulkier and maybe an inch or 2 too short. Full length was too long, but half length was a bit on the short side. The petticoat goes underneath other skirts, so it won’t be visible. And I wear it only for dancing anyway, so having it a bit short keeps me from tripping on it.
So now, I have the next layer in the dress complete. Here are some photos of me trying it on with a corset and combinations. I made the amusing mistake of fastening the waist ties in the front, the same way the bustle does. And then had a bit of a panic when it seemed that the front of the skirt was too long and the back was too short. Joe was like “wow, it’s not at all even”. Before I realized I was wearing it backwards like a ninny. So I flipped it around and, surprise! it fits as intended.