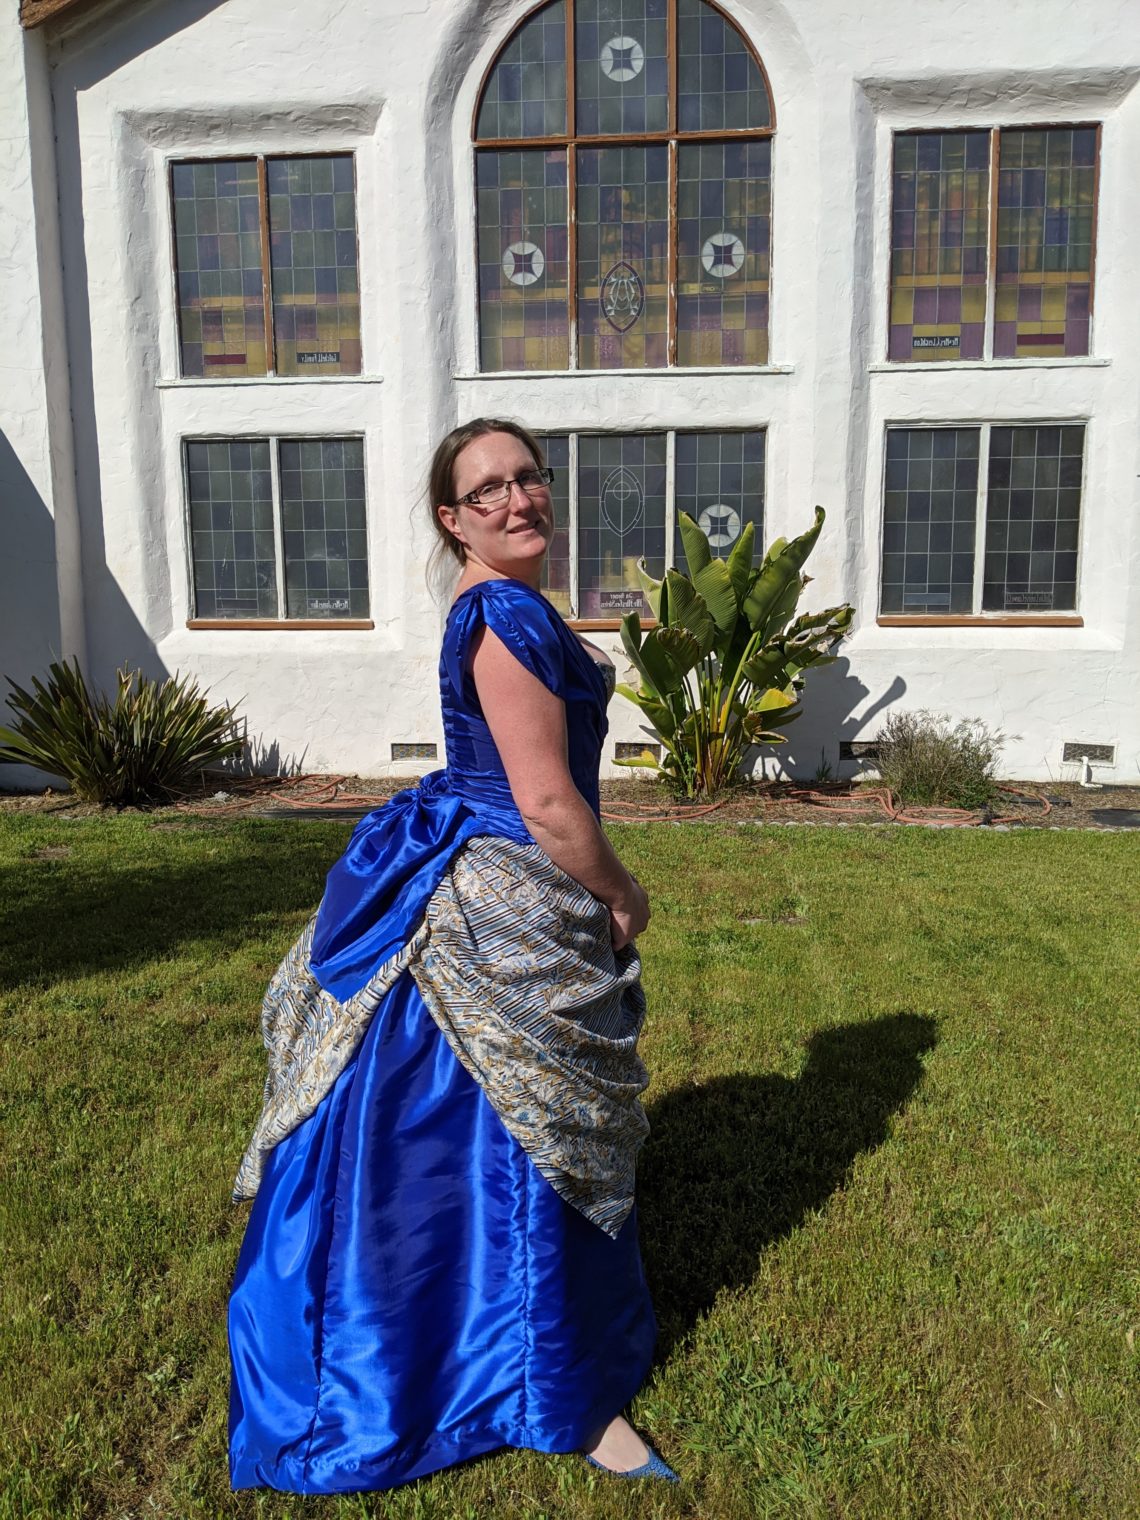
It is finally complete! The bluest of bustle dresses, all of its final edges hemmed, and its glorious butt-bow tied, it is finally finished!
Purpose
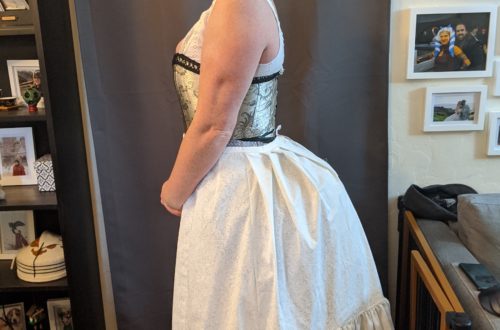
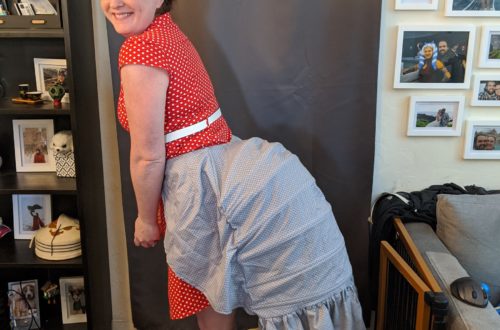
I began working on this dress in January, which feels like approximately 10 years ago. I started with the underpinnings: petticoat, bustle, combinations. Those all worked out splendidly, and even though they have their own idiosyncratic details to them, they are perfectly serviceable as underwear. I still need to fix the button holes on the combinations. I still need to fix a spot on the waistband of the petticoat where the ribbon sticks through. But I could never do any of those things and it would still be fine.
For the dress itself, this is my first time making something of this particular style and scope. So I decided to make this my “practice” dress. I purchased fabric for the overskirt and accents, a silk sari from etsy. I found a really neat striped floral pattern sari, which was 5 yards of fabric for about $20. The solid blue fabric on this is polyester taffeta. This is not historically accurate, but it is very inexpensive and I don’t have to feel too bad if I mess it up. So I ordered about 15 yards of this royal blue taffeta and set to work.
My plan for this dress was to wear it to 2 different events: A Victorian ball in April, with no specific era mandated, and an “Irish” Victorian ball in May, wherein I was planning to change out the overskirt and accents for plaid. As we all know, neither of those events happened. But I already had all of the supplies, so I continued making this dress. I definitely needed the practice.
Skirt
The skirt was, for the most part, very simple and quick to put together. Since this is essentially a glorified mock-up, I didn’t bother with hand-stitching yards and yards of trim everywhere. I just made a plain blue skirt. The front piece has 2 darts in it at the waist line. The 2 side pieces each have a dart and a pleat at the waistline. And the back panel is one huge piece with a ‘choose-your-own-adventure’ pleating arrangement. It says ‘pleat or gather’, so you can decide how many pleats and the spacing. The skirt pattern has 3 variations, with the main difference being the length of the train. I decided to go with the first, non-train, version because dancing. However, the fanciest, longest train version had 2 burnous pleats at the center back, so I decided to incorporate those into my skirt. Once all of the panels are assembled, the waistband is added, along with a hook and bar closure.
Then the final step is to hem the bottom. The hemming was by far the most challenging step. Because everyone’s height is different and the shape of my back-side and the bustle is unique, this affects how the skirt hangs. So hemming it by 1.5 inches all around would have left 4 inches dragging the ground behind me. It took several rounds of pinning and trying it on and re-pinning to get the length right all the way around. And the shape of the skirt is just not a straightforward circle or straight line. Its mostly straight in the front panel, with steep angled gores on the side panels and a very round shape around the back. So I spent a lot of time hand-basting and gathering and easing the hem into place.
In the end, I like the way the skirt looks. It’s very, very blue, one big blob of a single color. But otherwise, it fits well and hangs nicely. I left a little extra length in the center back, as I am now planning to make a bum pad to give the bustle that little extra umph. It swishes and sways nicely, but of course, it is made of polyester, so it doesn’t breathe. It’s like wearing a camping tent.
Bodice
The bodice, on the other hand, was a beast to put together. The front panels are made to look as if they are layered, but instead of being 2 separate layers, there are like 1.5 layers. These layers go together in a very confusing way. I had to baste them together a few times and take them apart again before understanding how it works. There is one bodice front panel that is the full size and shape of the front panel. This piece gets flat-lined and has 2 darts in the front. Over that, there is a layer that will be pleated around the shoulders, so this layer is much larger up top, but doesn’t cover the entire bottom. Finally, there is a third piece, the ‘vest’ piece, that covers this meeting point. The vest is essentially flat-lined to the center front and the bottom of the bodice piece, but the other side of it is encased in the dart. It’s …. complicated.
From there, the rest of the construction is very straightforward. Add the front side panels and the back side panels. Pleat the shoulder straps to the proper width. Add boning everywhere. Add facing to all of the edges to finish them neatly. Adding grommets to the back to lace up the center back. The pattern came with a modesty panel, but I chose not to make it for this mock-up. I chose to use some royal blue grommets that I found online, and they actually matched the fabric perfectly. It was fun and easier than hand-stitching a million eyelets.
The very final step is to create the butt bow. The 2 back panels are actually 1 large piece with a connecting rectangle for the butt-bow. So in the end, the large rectangle gets pleated upwards to resemble a bow, and when the back is laced up, the pieces fold over themselves and actually look like a bow.
The bow is by far my favorite part of this bodice. I am not entirely certain that I couldn’t get the same or a better result by making a completely separate bow piece that just attaches after the bodice is laced or covers the lacing. But this was certainly an interesting construction detail. It makes getting into and out of the bodice a bit of a struggle, but anything that laces up is already trouble.
In the end, I feel like I didn’t like the bodice design as much as I thought I would. The bow in the back is great. But the pleating on the front just didn’t work how I thought it would. The bottom of the pleated piece is gathered, but the top is pleated. This results in a puffy look. But I had imagined it would be nice, even pleats. My end goal was to take some of my striped accent fabric and cover some of the pleats to make it look like there were layers. But it doesn’t really work out that way. I ironed them down and tacked them in place so they’d lay flat, but there is no space to add decorative alternating fabric. And in the end, I didn’t find that having a bunch of fluff right on the chest was flattering on me. So for now, I am pondering what to do. I’m not sure if I want to make the same pattern with the butt bow and just leave off the front pleats and ruffles. Or if I should just go with another pattern. Since the butt bow is connected to the back pieces, it is also not possible to make the bow from a contrasting fabric, but making the bow a totally separate piece and attaching it at the end would allow for more flexibility. I’m sill thinking on this one.
The Final Results
In the end, the dress is a nice, vibrant blue. I certainly would not advocate making the whole thing from one solid color again, but with the striped overskirt and the striped chest piece, it has enough variation to add interest. The next step is to begin making the ‘real’ dress. I have purchased some lovely silk taffeta, and I am hoping to make a fully realized, detailed, trimmed dress from that. I learned a lot about the construction and fit from this process, so I am ready to tackle it with the pricy fabric.