And goals for the year
Ok, so this will be a brief post. But it is the beginning of some fun things to come. I have signed up for a major costuming event at the end of summer, more details later. I’ve also committed to some other costume events, and started taking some historical dance classes. So I’ve made a quite long list of things that I intend to make this year.
I made some lists and some sketches and proceeded to start purchasing fabrics, trims, notions, patterns, and sewing accessories I probably should have already owned. Things like a tailor’s ham and marked pattern paper. And to that end, I decided to complete a project that I had previously considered but never actually started work on: my dress form.
I have a dress form that I received as a Christmas gift while still a starving graduate student. It is a basic model, with changeable bust, hip, and waist measurements. It is useful for hanging dresses, preparing to even the hem, and storing/layering complicated multi-piece garments with petticoats, underskirts, overskirts, corsets, etc. However, there are things it can’t do and, as I have expanded my own sewing abilities and experiences, I have realized that those things can be pretty important for allowing my own creativity through. The dress form I have is hard plastic with a flocked velvet-type coating to keep fabrics from slipping off. But, since it is hard plastic, it can’t be pinned. This means that any proper techniques for drafting a bodice pattern are completely out the window. It also doesn’t have any of the princess seams outlined, which I can deal with, but I think it would be helpful to myself as a newer sewist to have those guidelines. And finally, while I can put a corset on it, it is still hard plastic and doesn’t have any give to it. It doesn’t squish into the molded corset shape the way my squishy human body does.
What to do? I found a place online, bootstrap fashion, where you can submit your own personal measurements and fill out a questionnaire about your body type and proportions and they’ll make you a pattern for stitching your own dress form. I carefully took all of my measurements, ordered the pattern, found a lovely non-stretchy paisley upholstery fabric from Joann, printed and cut out the pattern and taped all the paper pieces together and…. never touched it again. Now, a year later, I am hoping to do some complex drafting and I need a pinnable dress form. So I pulled out the pattern and the completely uncut upholstery fabric and picked up where I left off, over a year later. As a way of ‘challenging’ myself, I ordered the pattern without the optional seam allowances. So this was my first time having to add an allowance to the fabric as I am cutting out pieces.
The pattern is made to create a dress form from scratch, and they suggest buying a wooden hat rack or similar to put the form on. But since I have a dress form already, I thought I would try putting it on its smallest size, then putting this fabric one over it, with a couple of inches of polyfill padding to make it pinnable, but then it’s already on a metal stand and has a hem measurement thingy. The only alteration I had to make to the pattern to be able to do this was to add a zipper to the seam down the center back. This allowed me to get the fabric form over the plastic one and made filling with stuffing much easier.
So, without further ado, here is my ‘completed’ dress form! She’s a bit lumpy, as I ran out of polyfill and I think she could be a bit firmer, but otherwise, it’s completely usable. I left the arms open to allow myself to add more stuffing, as well. But, upon measuring, even a year after purchasing the pattern, every measurement matches with my own, so yay for getting the seam allowances right!
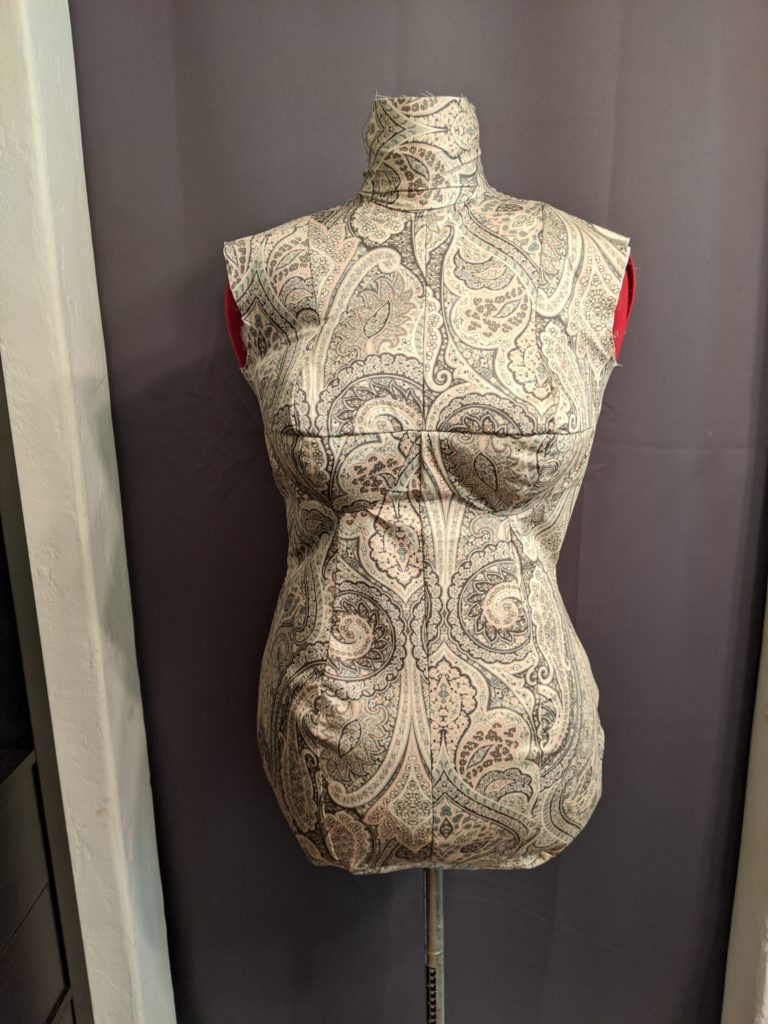
My very own lumpy space princess
Creativity level: maximum
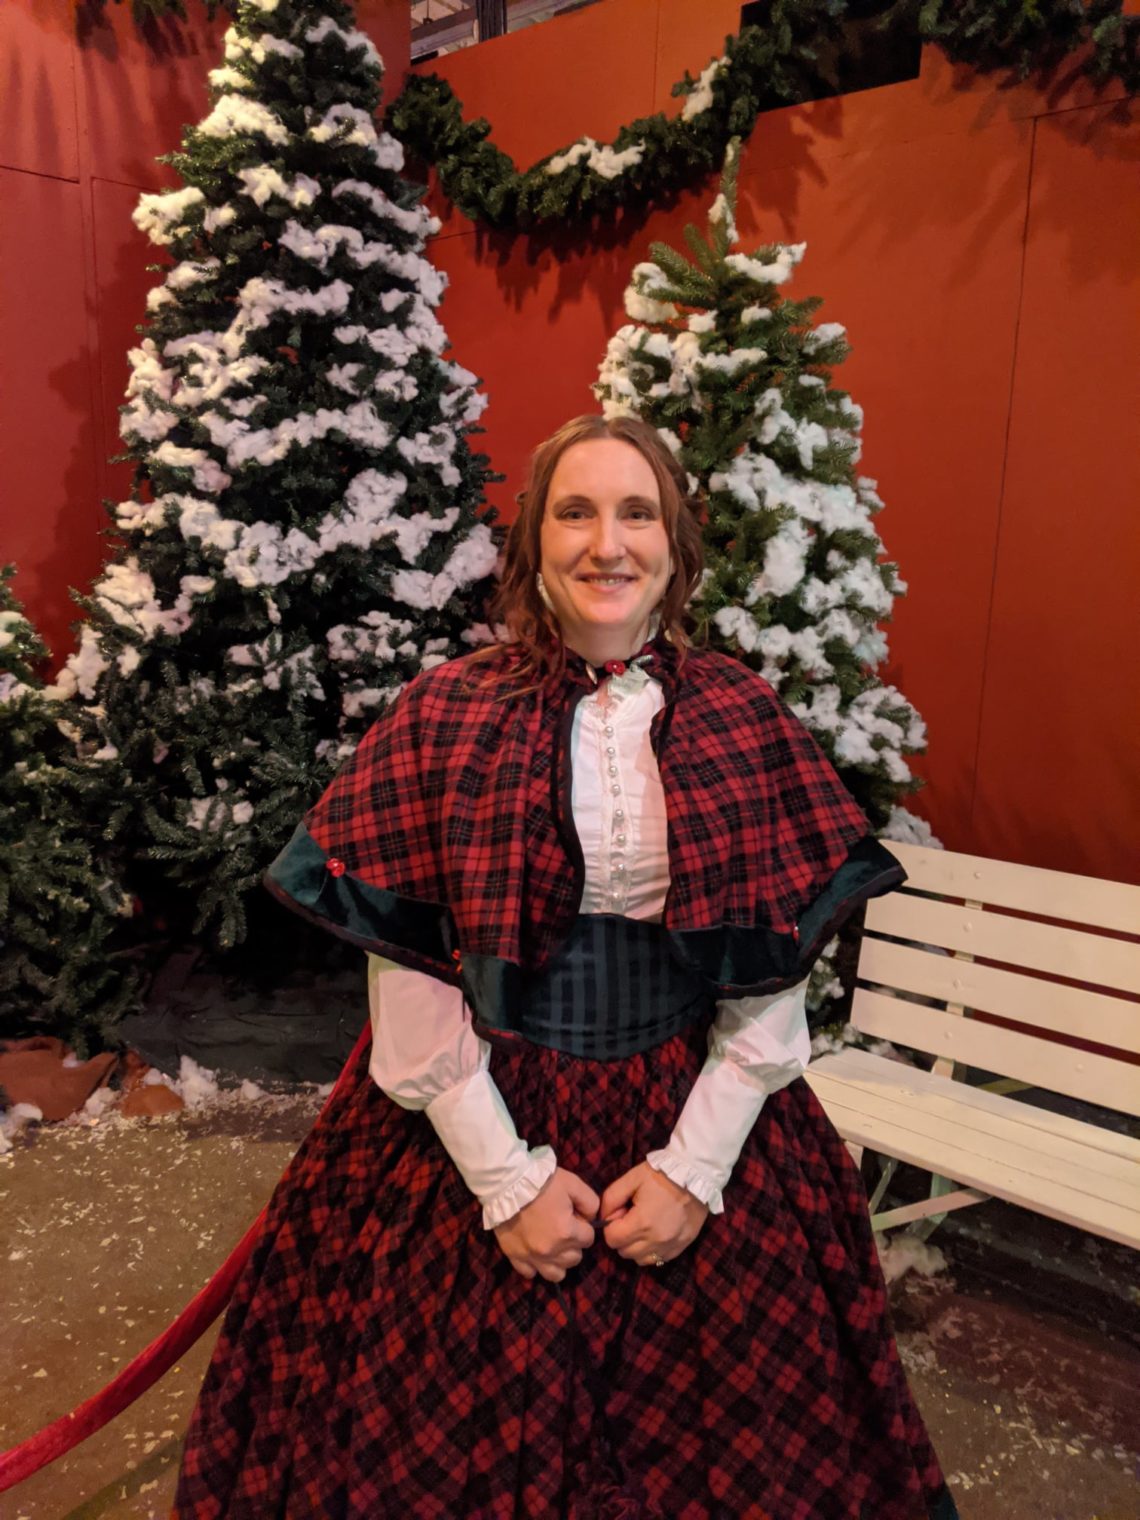
This is just kind of a weird, personal side note here, but I wasn’t sure where else to put it. My inspiration for all of this sewing kind of came up suddenly. We decided to go to the Dickens Fair this year, as we do many years. But this year was the first time I decided to make a dress specifically for this event. But I made that decision precisely 1 week before the day I planned to go. I went out on a Sunday afternoon and purchased a bolt of the Christmas-y-est red/green plaid I’ve ever seen, and the next Sunday, I was strutting through Victorian London wearing my whole outfit: a brand new plaid skirt, matching cape and reticule, and a purchased white frilly shirt.
I hand-stitched lots of it. I machine stitched some of it. I added ribbons and bows and soutache. I really *enjoyed* making it. I have always liked sewing, and it is usually a great way to get things that are inside my head out of it and into the real world. But as someone with not a ton of experience and no formal training, the act of sewing is very often frustrating and the outcome frequently disappointing.

Hand stitching some trim while Pooka watches 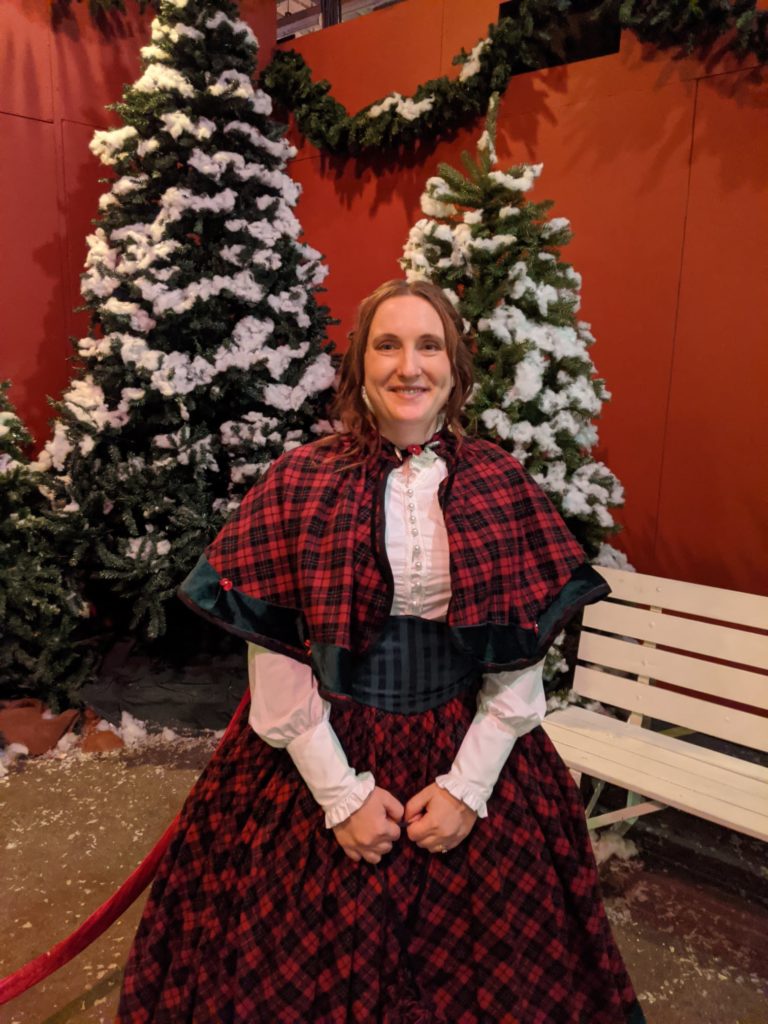
The completed ensemble 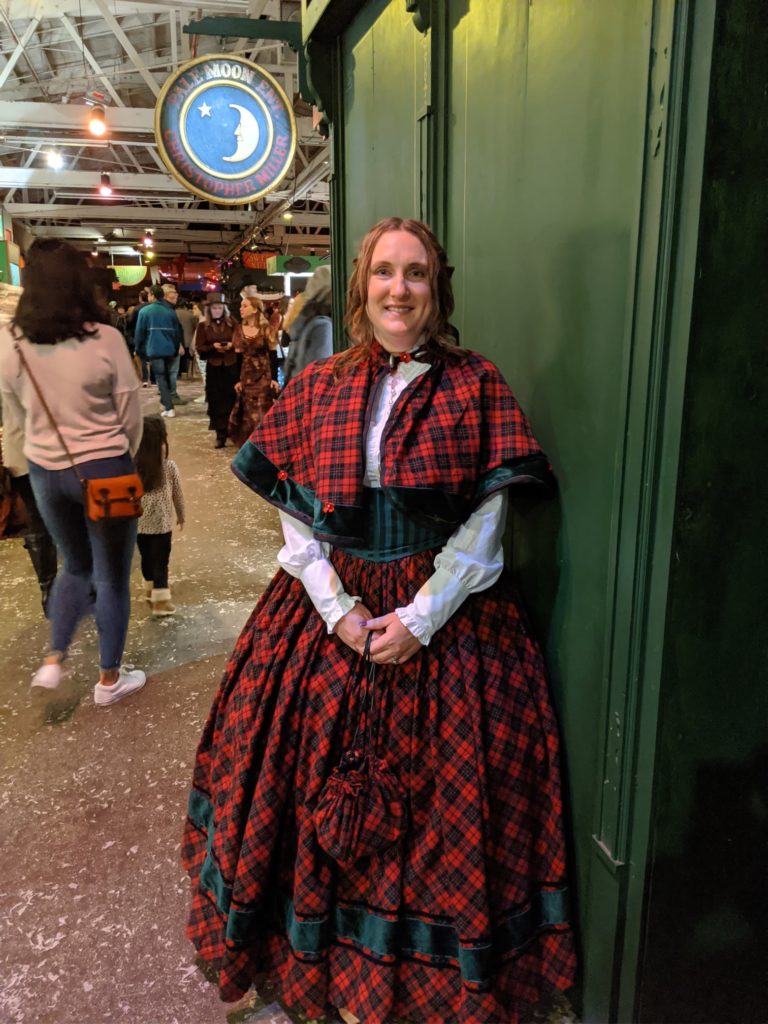
The reticule bag really blends in with this obscene amount of plaid 
Post Dickens Fair, posing with the poodle
But this year, not on purpose, just as a fun way to spend my free time, I have fallen down the Youtube rabbit hole. It began with cooking videos. I followed the FoodWishes Chef John down the tartiflette path and up bigos road and back through homemade rye bread valley. Cooking is almost never disappointing 😉 . But then I found Angela Clayton’s Youtube channel. I watched every video over the course of a couple of months. Her voice is so soothing. And she is making beautiful costumes. And sometimes she makes mistakes and sometimes things go perfectly. She’s relatable and interesting. But most of all… she talks about sewing while sewing. And she uses the proper terminology. And some combination of watching someone sew with proper techniques while learning the proper verbiage made it all click for me. I learned so much about pattern matching and grain lines and what all those pesky instructions mean when you buy a commercial pattern. They’re almost indecipherable if you don’t already speak the language!
From there, I found a few more youtubers who I follow and enjoy. And that is why I was able to make a dress in 1 week. It’s not perfect. But I felt so excited by my success that I’ve thrown myself into the creative process for this upcoming year. And my plan is to post here at least once a week, with photos and updates on things I’m making, either sewing or cooking. And I have a couple of posts about my fun trip over Thanksgiving that I haven’t finished yet. I want to document and share my journey into madness.
I also watched a video on making cappuccino art.


2 Comments
clare
What a lovely post! I am so happy you are back into blogging. I used to sew a lot when I was in high school…I made dresses and skirts and even pants! I still have my sewing machine but don’t do it as often. I can’t wait to see what else you create! So do you buy the patterns? I love looking for fabric. There used to be so many more fabric stores than there are now! I’d also love to see you make a hat! 🙂
Tina
Thanks! I usually only sew costume-y things. I don’t think my skill level is good enough to make day-to-day wear and not have it look super homemade. Sometimes I buy patterns. Sometimes I have an idea in my head and kind of make up my own pattern. I am watching a lot of youtube videos lately about how to properly draft patterns, which requires a pinnable dress form! So hopefully I’ll be learning more of that. I am just starting to do these historical projects, so for now, I am relying pretty heavily on patterns. There are lots of actual patterns remaining from the early 1900s that are reproduced, so you know you’re making something very historical accurate 🙂
And I made a hat this week… so I’ll put that up soon.